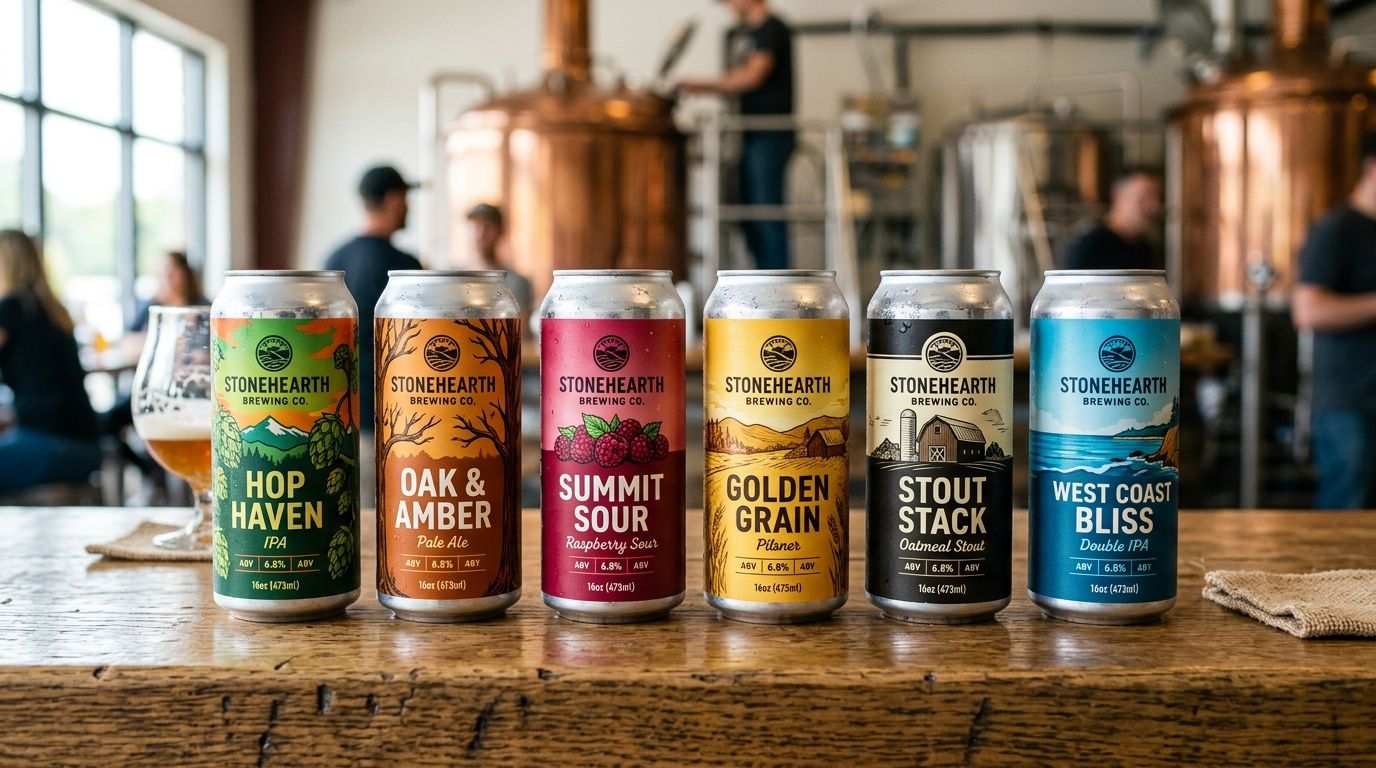
Custom labels for craft brewery cans are pressure-sensitive or shrink-sleeve prints applied to bare aluminum cans, built to survive cold storage, condensation and handling while giving every release its own shelf identity. Breweries need something bigger operators don't: short runs per batch, fast turnaround before canning day, and labels that still look sharp after two hours in an ice bucket at a farmers' market.
- Custom labels for craft brewery cans need condensation-resistant material, not standard paper stock, or they peel within hours.
- Pressure-sensitive labels work for most small-batch runs; shrink sleeves suit full-can wraps and irregular can shapes.
- Print Fast offers Same Day and 24Hr label printing in Toronto for breweries running tight canning schedules.
- Proof every new SKU physically before the full run — screen colour never matches ink on foil-backed stock.
Why this matters for Toronto-area breweries
A brewery's label isn't decoration — it's the only thing separating a seasonal IPA from a flagship pale ale on a crowded shelf. Small breweries also turn over SKUs faster than most retail brands: a new hazy release, a one-off collab, a summer seasonal that only exists for eight weeks. That churn means label print runs are smaller, more frequent, and less forgiving of long lead times.
Get the label wrong — wrong size, wrong material, wrong turnaround — and canning day stalls. That's the entire reason custom labels for craft brewery cans get treated as a production input, not a marketing afterthought, by anyone who's run a canning line before.
Match label size to your can format
Start here before you touch artwork. Slim cans, standard 355 mL/12 oz cans, and 473 mL/16 oz tallboys all take different label dimensions, and a label cut for the wrong can either wraps with a visible seam or leaves bare aluminum showing.
- Measure the can's actual circumference at the label zone, not the stated can size
- Decide on wraparound coverage: full-body wrap vs. front-and-back panel
- Account for the can's neck taper if you're running a tallboy
- Confirm bleed and safe zones with whoever sets up your dieline
- Order a sample can mockup before finalizing dimensions
Check your compliance requirements
Health Canada and provincial rules dictate what has to appear on the can — alcohol content, volume, allergen declarations, and standard drink information — before a single design decision gets made. This is the step breweries skip when they're excited about artwork and regret when a batch gets held at the LCBO.
- List every mandatory disclosure your product category requires
- Confirm minimum font size rules for regulated text
- Leave a dedicated panel for compliance copy separate from the brand art
- Check if your province requires bilingual labeling
- Keep a compliance checklist per SKU, not per brand — IBUs and ABV change release to release
Pick a material built for cold, wet cans
Standard paper labels fail on brewery cans because condensation soaks the adhesive within hours. This is where most first-time canners lose money reprinting a batch.
- Choose a waterproof, film-based label stock over uncoated paper
- Confirm the adhesive is rated for cold, wet surfaces, not just standard indoor use
- Test how the label handles ice-bucket submersion, not just a fridge shelf
- Ask about matte vs. gloss laminate — gloss shows condensation streaks less
- Run a physical adhesion test before committing to a full print run
Custom stickers for small business packaging follow the same material logic — the custom stickers for small business packaging guide covers waterproof stock options worth comparing before you lock in a can label material.
“If the label peels in an ice bucket before the beer's gone, it's the wrong material.”
Compare pressure-sensitive labels vs. shrink sleeves
Most small breweries default to pressure-sensitive labels because they're faster to prototype and cheaper to run in small batches. Shrink sleeves cover the whole can and hide seams better, but they need heat-tunnel equipment most small operations don't own in-house.
- Pressure-sensitive: apply by hand or with a basic labeler, fast to reorder
- Shrink sleeve: full 360-degree coverage, better for irregular can shapes
- Pressure-sensitive: easier to test one new SKU without retooling
- Shrink sleeve: hides can seams and rivets completely
- Pressure-sensitive: shorter minimum runs suit rotating seasonal releases
Prep artwork files correctly
A label that looks perfect on screen and prints wrong is the single most common delay in this whole process. Files need to match the exact dieline, not an approximate rectangle.
- Build artwork in CMYK, not RGB — screen colour never matches ink
- Include a 3 mm bleed on every edge that touches the can's curve
- Outline or embed all fonts before sending the file
- Flag any spot colours (like a signature brand purple) separately
- Send print-ready PDFs, not editable design files, to avoid version mix-ups
Time your print run around canning day
This is where turnaround decides whether canning day happens on schedule or gets pushed a week. Breweries often finalize a recipe and want labels the same week they can it — that's not a standard print-shop timeline unless the shop is built for it.
Print Fast runs 1Hr, Same Day and 24Hr turnaround out of Toronto specifically for businesses that can't wait a standard print cycle, with Local Delivery and Live Support if a run needs adjusting mid-order. For a brewery locking a canning date, that's the difference between shipping on schedule and pushing the whole batch.
Get a custom label quote fast
Same Day and 24Hr turnaround for Toronto-area label runs.
Proof before you commit to the full run
Skipping a physical proof to save two days is the fastest way to lose a full batch of labels. Screen colour, foil finishes and metallic inks especially never render accurately until they're on the actual stock.
- Request a physical proof, not just a digital PDF preview
- Check the proof under both daylight and fridge-case lighting
- Confirm the compliance text is legible at the printed size, not just the file size
- Apply the proof to an actual can before approving the full run
- Sign off in writing so the run matches what you approved
Store and apply labels correctly
Even a well-printed label fails if it sits in a hot warehouse for three months before use. Storage conditions affect adhesive performance as much as the material choice does.
- Store label rolls flat, away from direct heat or sunlight
- Keep humidity moderate — adhesive degrades faster in damp storage
- Apply labels to cans at room temperature, not straight out of a cold rinse
- Rotate stock so older label batches get used first
- Keep a small buffer of extra labels per SKU for damaged-can replacements
Label options compared
| Option | Best for | Key limitation |
|---|---|---|
| Pressure-sensitive labels | Small-batch and rotating seasonal releases | Visible seam where the label wraps |
| Shrink sleeve labels | Full 360-degree can coverage | Needs heat-tunnel equipment to apply |
| Direct-to-can digital print | High-volume repeat SKUs | Long minimum runs, slow setup for one-offs |
| Blank cans with stick-on labels | Testing a new recipe before a full label order | Least polished shelf presence |
Common mistakes craft breweries make
- Ordering paper labels for cold cans. Standard paper stock soaks through in an ice bucket within a couple of hours — always confirm waterproof, cold-rated adhesive.
- Skipping the physical proof. Metallic and foil finishes look different on screen than on the can; a digital preview alone isn't enough to approve a full run.
- Sizing one label for every can format. A label cut for a standard 355 mL can won't sit flat on a 473 mL tallboy without a visible gap or overlap.
- Missing compliance text until the last minute. ABV, volume and allergen disclosures need their own panel — cramming them in after the design is finished usually means shrinking mandatory text below legible size.
- Rush-ordering without a buffer for damaged cans. Print a small overage per SKU so a dented can on the line doesn't stall the whole packaging run.
FAQ
What's the best label material for craft brewery cans?
A waterproof, film-based pressure-sensitive label with a cold-rated adhesive is the standard choice for craft brewery cans in 2026. Paper-based stock soaks through in an ice bucket within hours and isn't suitable for cold, wet conditions.
Are pressure-sensitive labels better than shrink sleeves for small breweries?
Pressure-sensitive labels suit most small breweries because they're cheaper to prototype and don't need heat-tunnel equipment. Shrink sleeves give full 360-degree coverage but require more setup, which favours larger, repeat-run operations.
How fast can I get custom can labels printed in Toronto?
Print Fast offers 1Hr, Same Day and 24Hr turnaround on custom label printing out of Toronto in 2026, depending on quantity and material. Standard print shops without rush service typically run 5-10 business days.
What information is legally required on a craft beer can label?
Canadian regulations require alcohol content, volume, and standard drink and allergen disclosures on beer can labels, with provincial rules layered on top. Confirm current requirements with your provincial liquor authority before finalizing artwork, since rules vary by province.
Can I order a small test batch of can labels before a full run?
Yes — ordering blank cans with stick-on labels or a short pressure-sensitive run lets you test a new recipe's branding before committing to a full print order. This avoids reprinting an entire batch if the design needs adjustment.
Do custom can labels need to be waterproof?
Yes, craft brewery cans need waterproof labels rated for cold and condensation, not standard paper stock. A label that isn't rated for wet conditions will start lifting at the edges within a few hours in a cooler or ice bucket.
How much lead time should I plan for custom brewery labels?
Plan for at least 24-48 hours with a rush print shop, or 5-10 business days with a standard shop, plus time for a physical proof approval. Building proof time into your canning schedule prevents last-minute delays.
One last thing
The detail that trips up most first-time canners isn't the artwork — it's condensation. A label that looks perfect dry and lifts at the corner after 90 minutes in an ice bucket is a material problem, not a design problem, and it only shows up once real cans hit real coolers. Test a physical sample under cold, wet conditions before approving any full run of custom labels for craft brewery cans.
Order product labels from Print Fast: product labels at PrintFast.ca. Need a price first? Submit a custom quote request.